🚀 Getting Started with Blognami
Welcome aboard! 🎉 Blognami is an open-source blogging platform built on its own full-stack web framework — Pinstripe. This guide will walk you from nothing installed to your first post live in just a few minutes.
You’ll learn:
- How to set up Blognami on your machine
- How to sign in as an admin
- How to create and edit posts
- A quick intro to Pinstripe, the framework behind it
🖐 Hi, I’m Jody Salt, the creator of Blognami — and I’m genuinely excited you’re here. This project is still in its early days, so you’re getting in on the ground floor. Let’s build something great together.
🛠 Step 1 — Check Your Setup
Before we touch the keyboard, make sure you have:
-
Node.js version 18 or higher
-
A Unix-compatible environment, such as:
- Linux ✅
- macOS ✅
- Windows (via Windows Subsystem for Linux — WSL) ✅
💡 Pro Tip: Even if you’re on Windows, installing WSL makes life much easier for modern web development.
📦 Step 2 — Create Your First Project
We’re going to let Pinstripe (Blognami’s command-line sidekick) handle all the setup.
In your terminal, run:
npx pinstripe generate-project --name foo --with blognami
cd foo
npx pinstripe initialize-database
npx pinstripe start-server
Then, open your browser and visit:
🎉 Boom — your first Blognami site is live!
To stop the server, press Ctrl+C.
📝 Why This Matters: These commands don’t just create files — they give you a fully functional app, database, and server in one shot, so you can focus on features instead of setup headaches.
🔍 Step 3 — What Just Happened?
In the past 30 seconds, you:
- Generated a brand-new Blognami project
- Initialized a fresh SQLite database
- Started a local development server
💡 Pro Tip: SQLite is perfect for development — no setup, zero configuration. For production, you can swap it for a heavier-duty database later.
🔑 Step 4 — Sign In as Admin
When you created the project, Blognami automatically seeded it with an admin account (defined in lib/commands/seed_database.js):
Email: [email protected]
Password: none (Blognami is passwordless ✨)
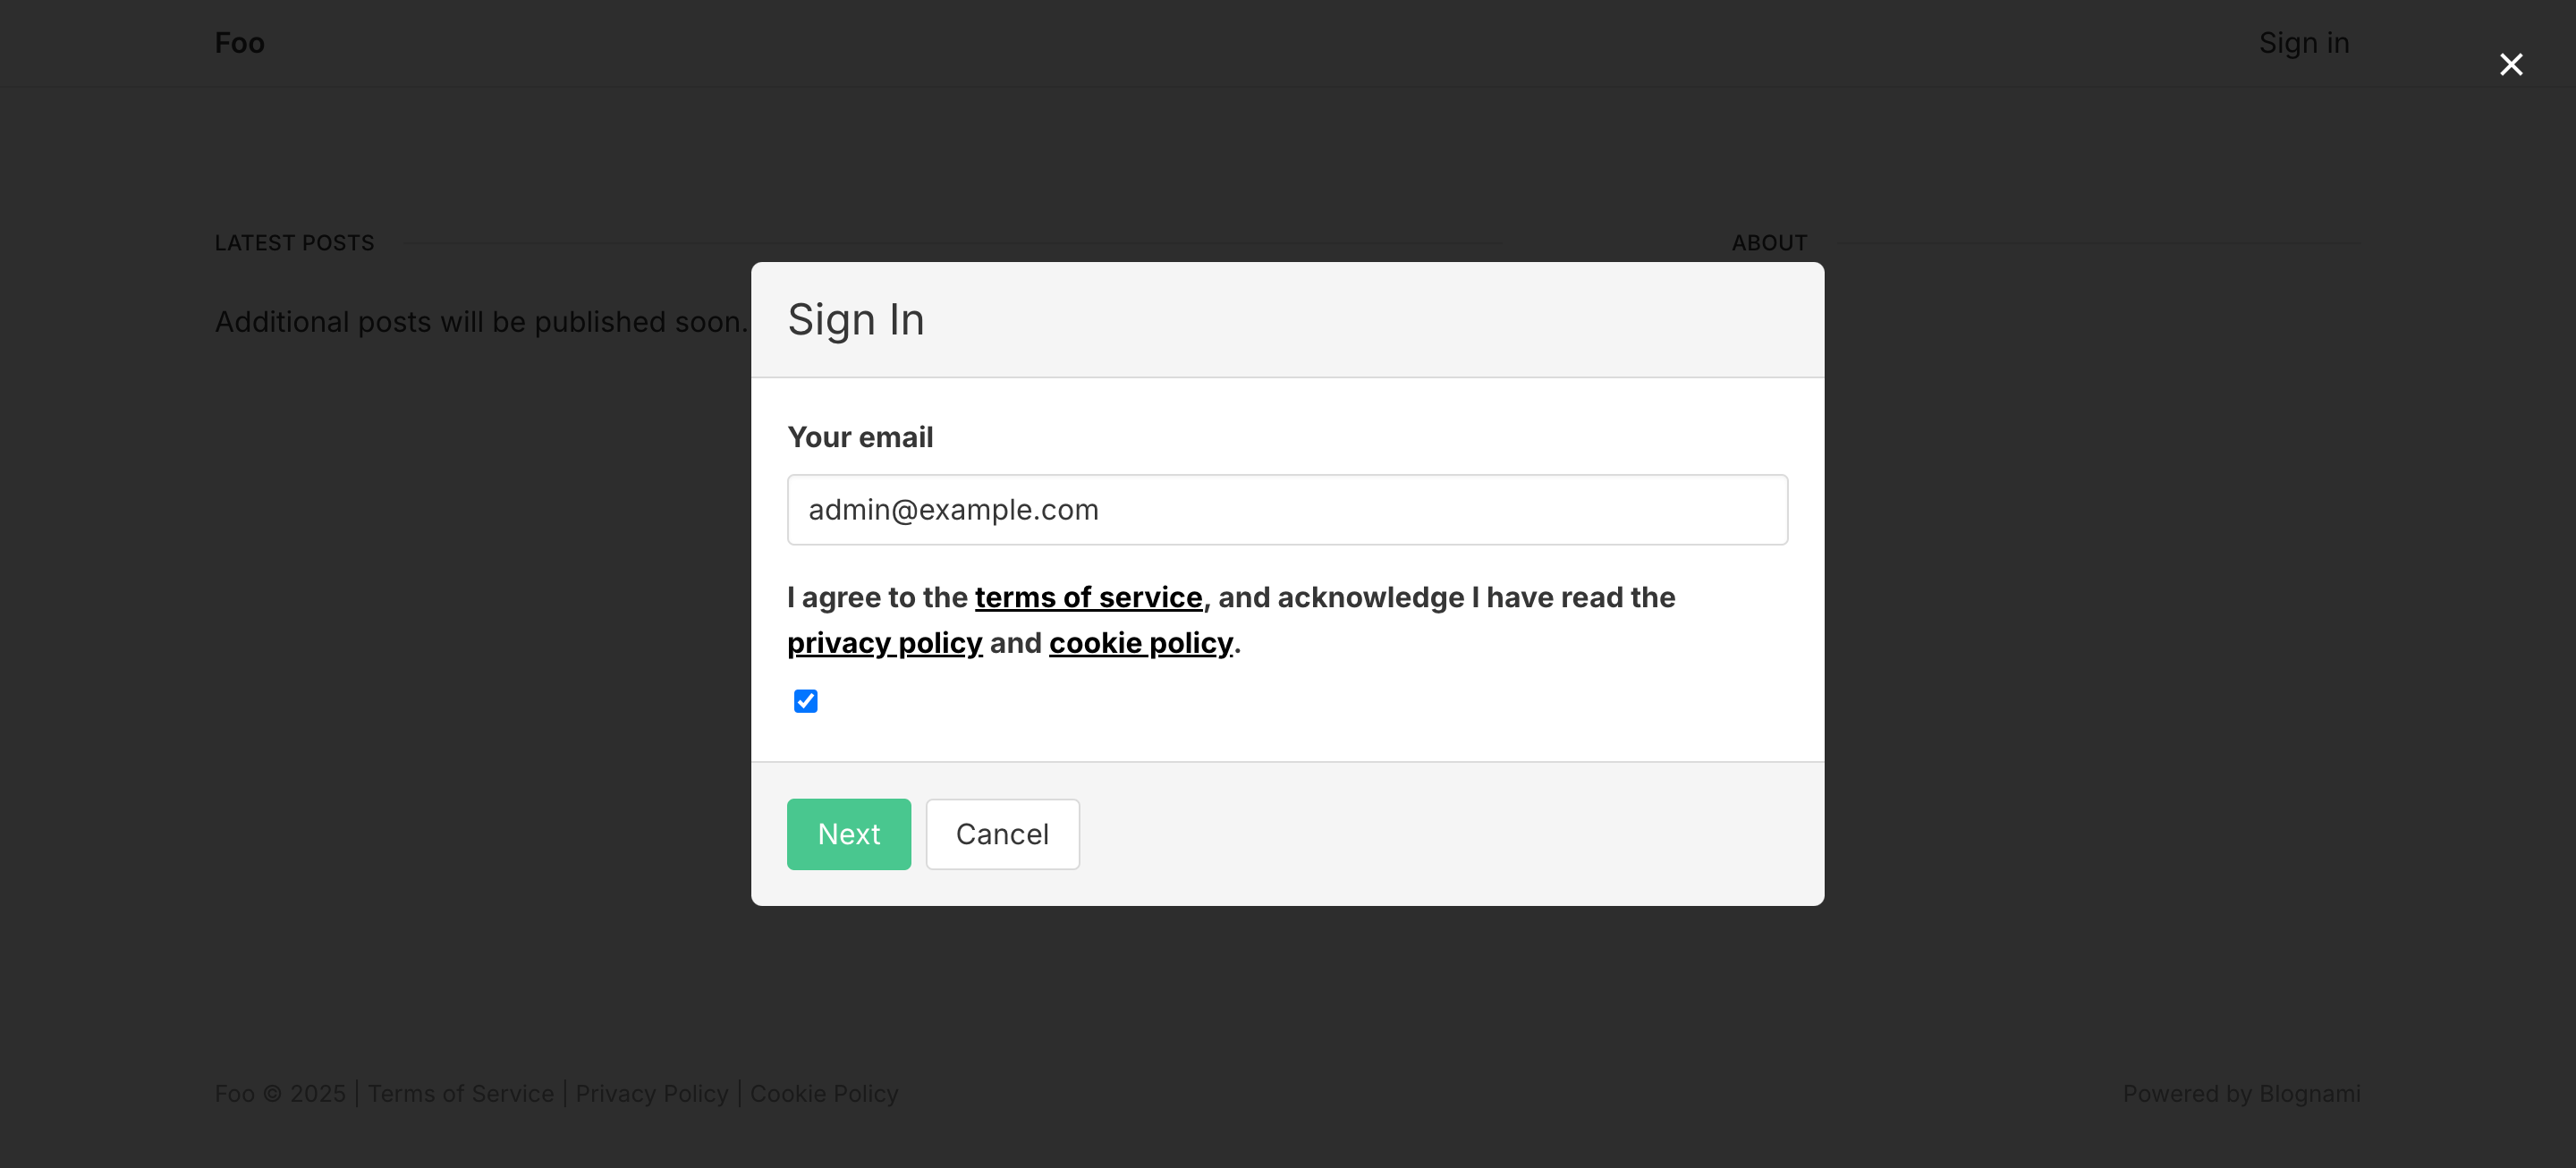
Here’s how to log in:
- Click Sign in in the navbar
- Enter
[email protected] - Tick the terms checkbox
- Click Next
You’ll be prompted for a one-time password (OTP). Check your terminal — Blognami “emails” it right there:

Enter the code, click Next, and… you’re in. 🎯
📝 Why This Matters: Passwordless login means fewer security risks (no password database to hack) and a smoother sign-in experience.
📝 Step 5 — Add Your First Blog Post
You’re now logged in as the boss — let’s make something.
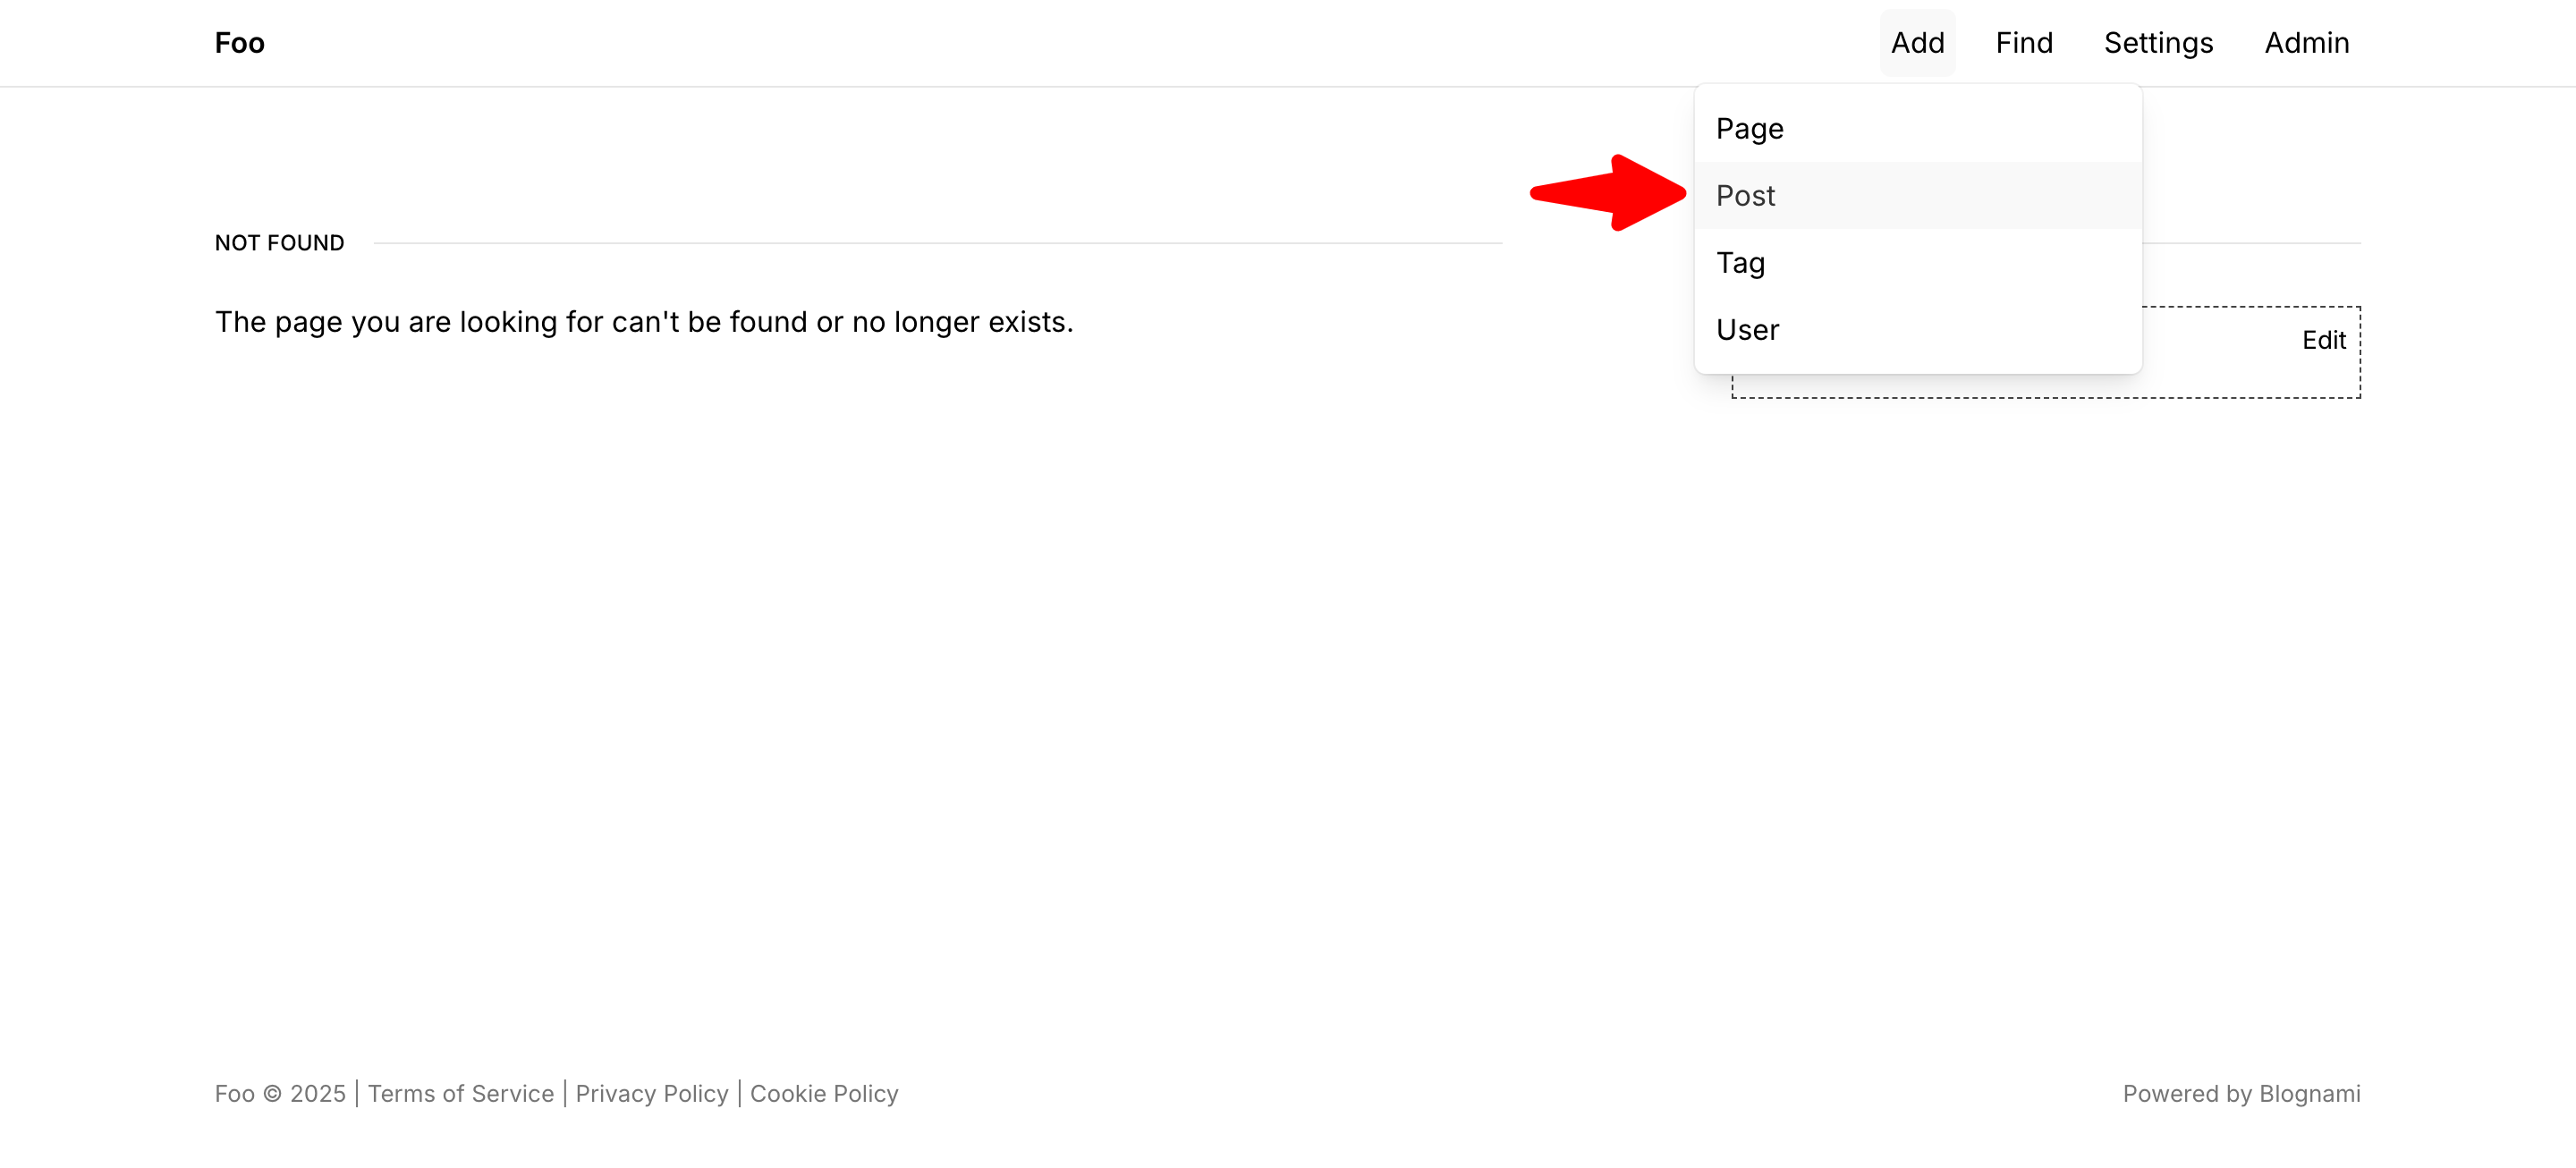
- In the navbar, click Add > Post
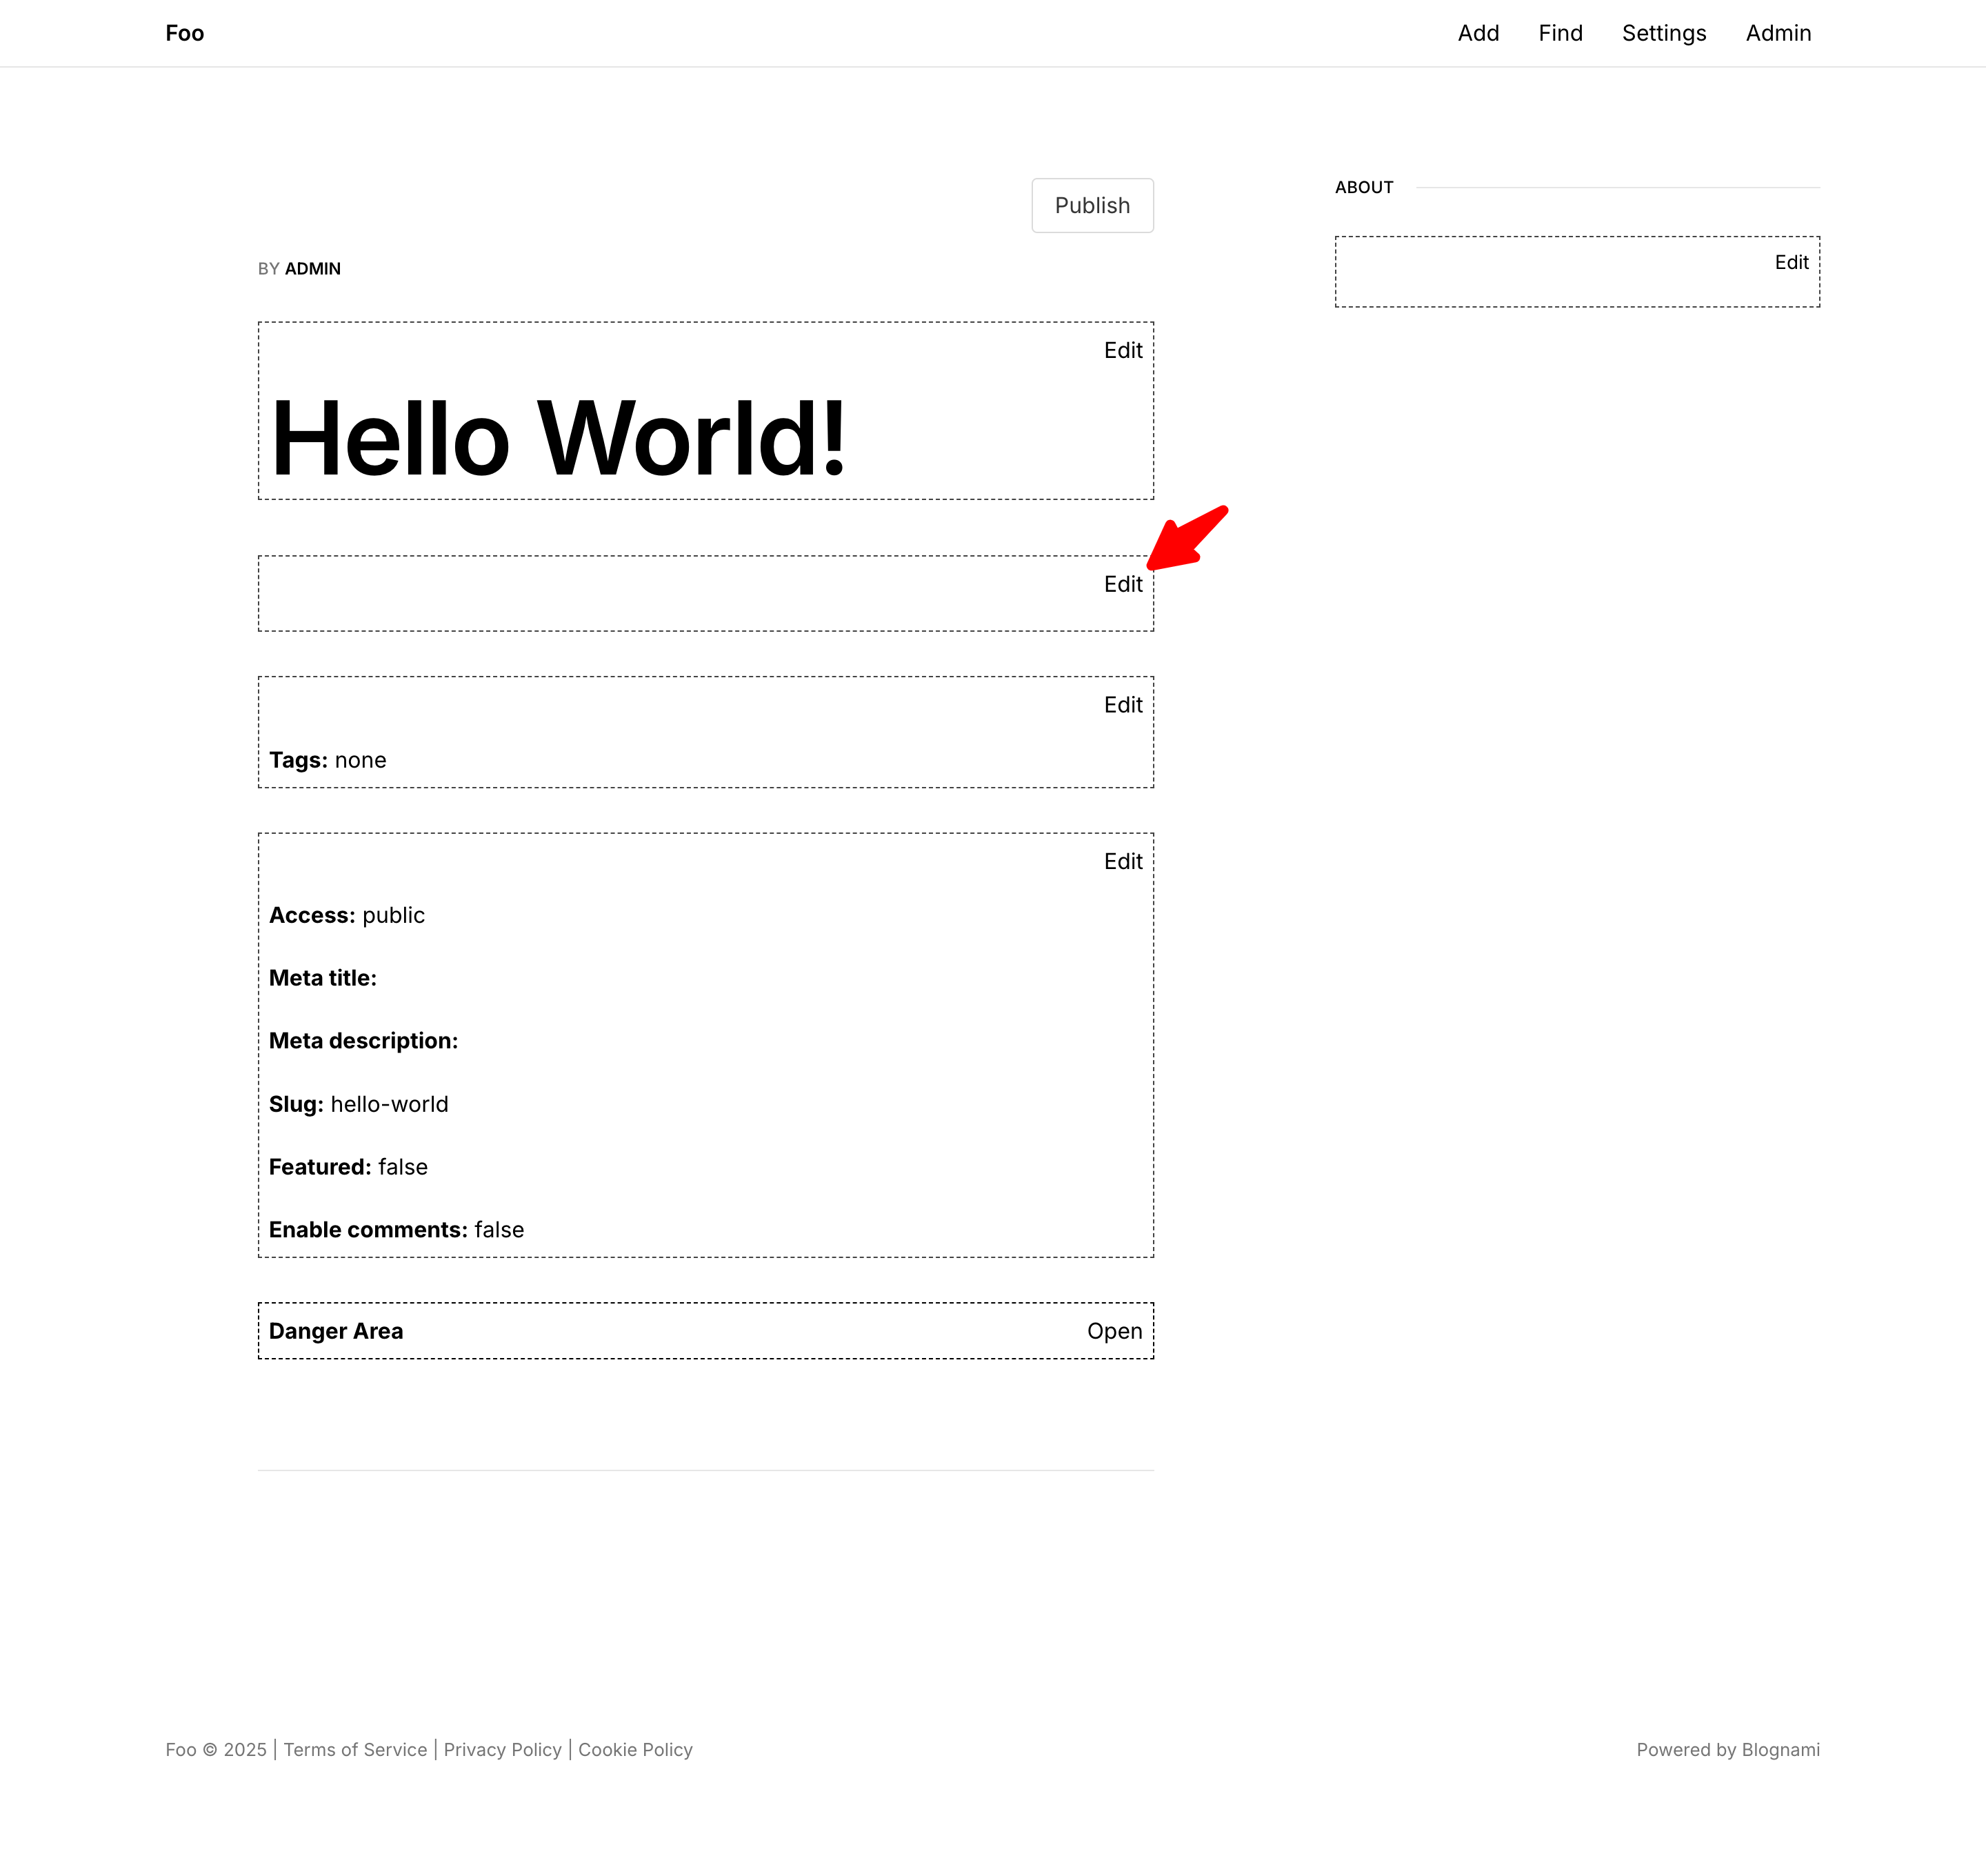
- Enter a title (e.g., Hello World)
- Click Add post
This creates your post shell. To add content, click Edit.
✍️ The Markdown Editor
You’ll see a split-screen Markdown editor:
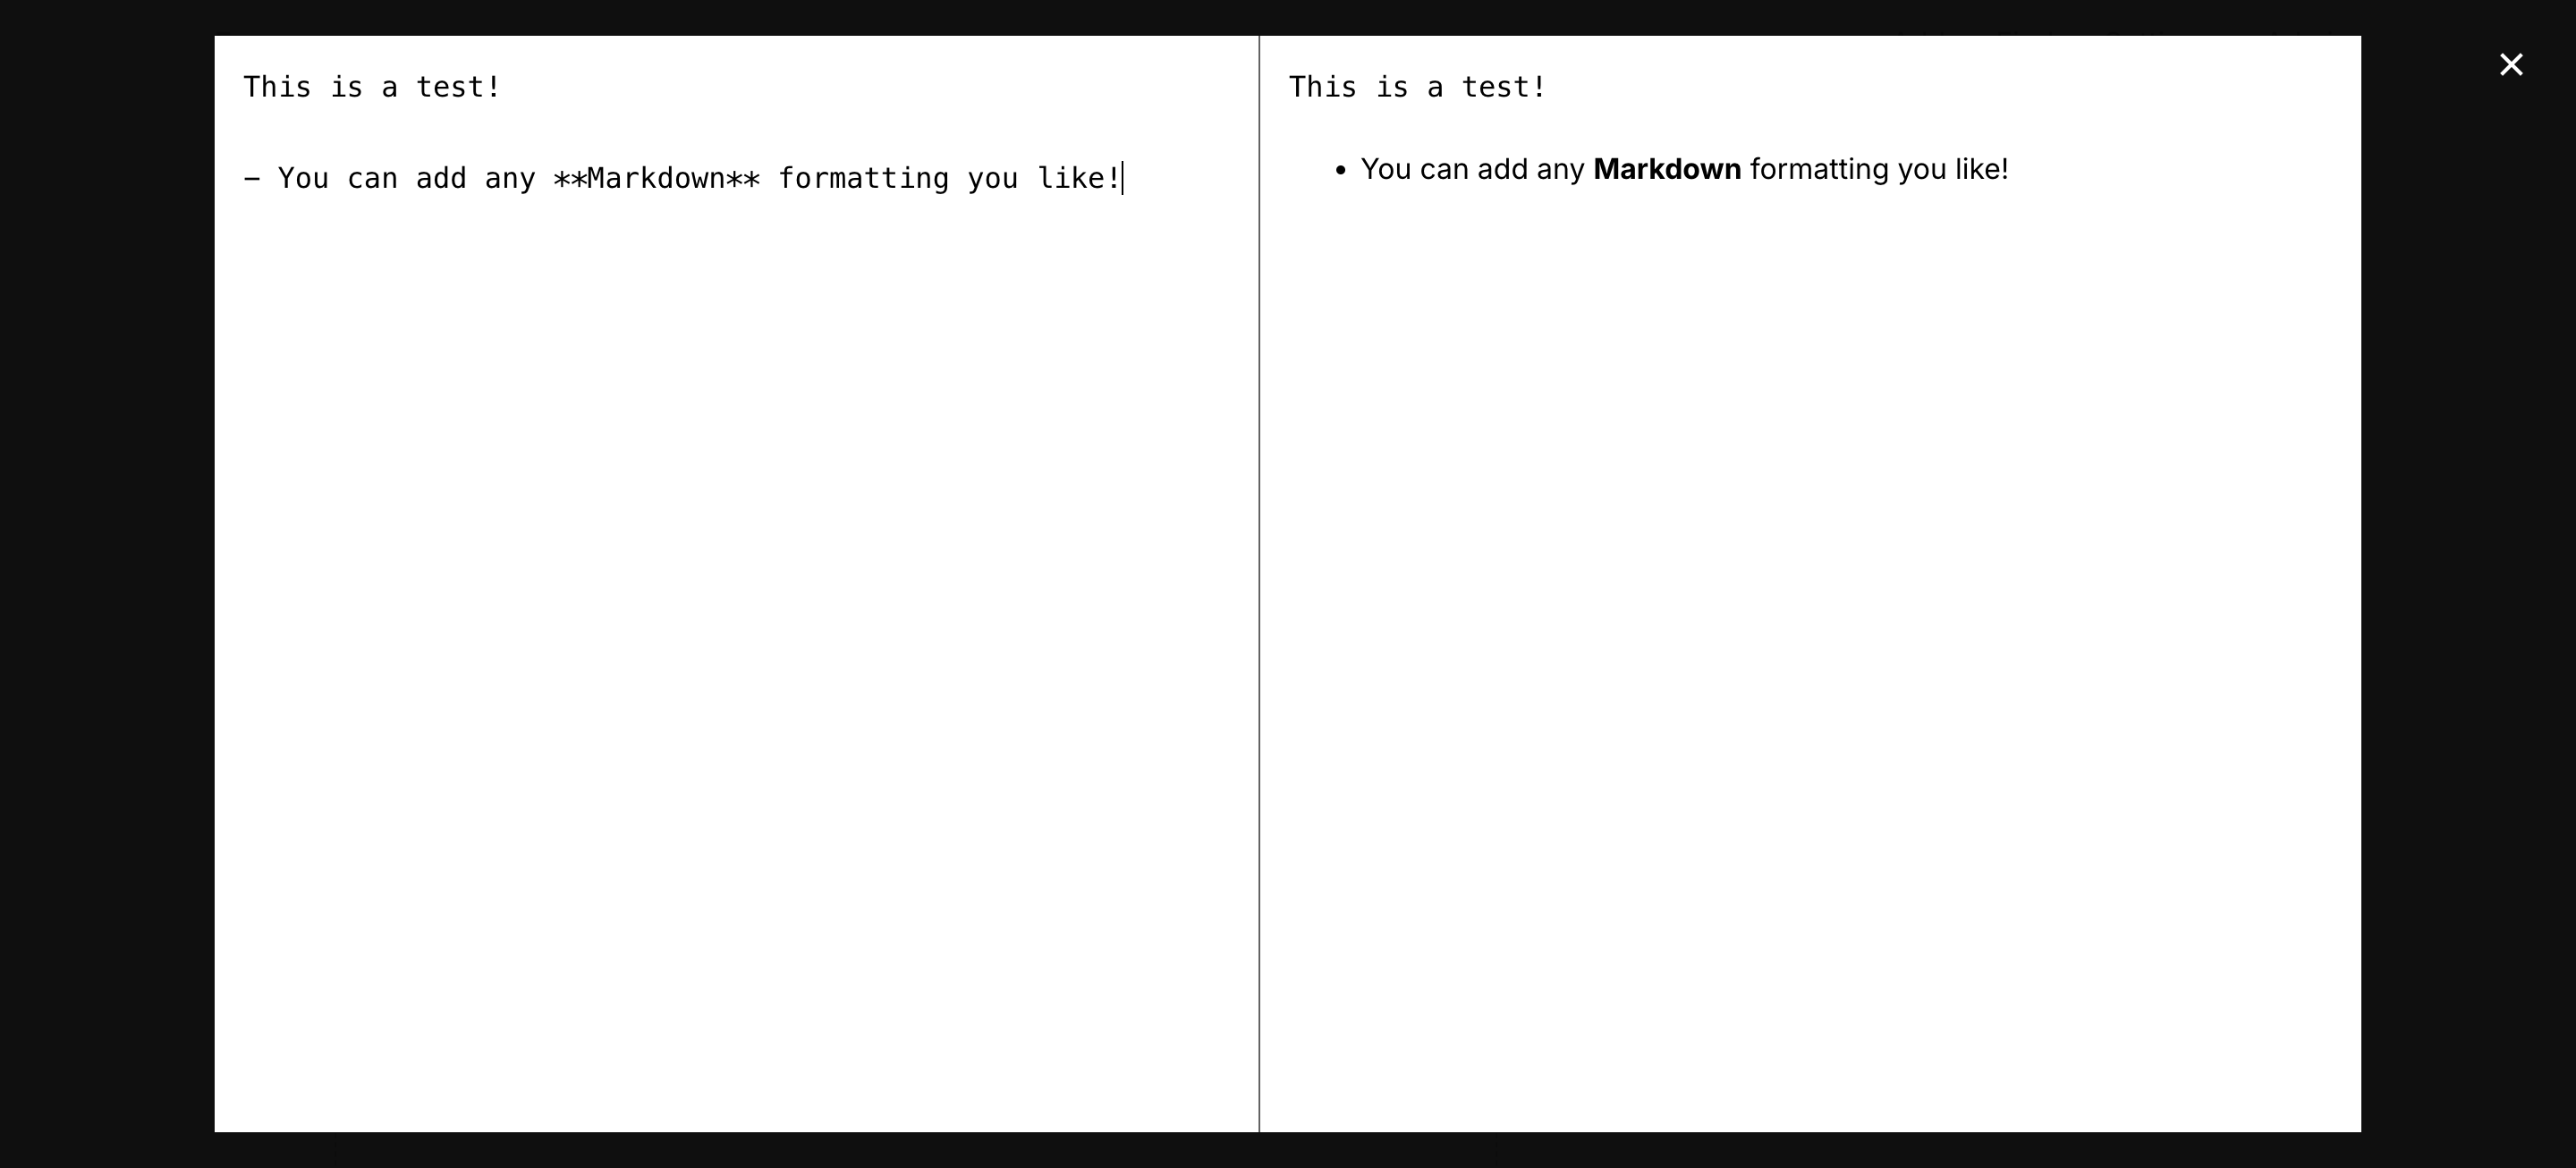
- Left: Write in Markdown
- Right: Live preview
When you’re happy with your post, close the editor and click Save Changes.
💡 Pro Tip: Markdown is fast, portable, and readable even without rendering — perfect for content you might want to version control.
If this were a live site, you could click Publish to make it public. Since this is just a test, feel free to explore other features — most are self-explanatory.
🔄 Step 6 — Reset If You Need To
Want to start fresh? Just run:
npx pinstripe reset-database
📝 Why This Matters: In early development, you’ll break things. Being able to instantly wipe and restart keeps you moving forward instead of debugging bad test data.
🧩 Step 7 — Meet Pinstripe
You’ve been using Pinstripe this whole time — it’s the CLI and framework powering Blognami.
Here’s the philosophy: Blognami and Pinstripe are symbiotic.
- Blognami benefits from Pinstripe’s flexibility — you can customize and extend it endlessly
- Pinstripe stays lean because Blognami makes sure every feature solves a real, tested problem
💡 Pro Tip: By building your app on Pinstripe, you’re also building on a framework that was born to run real-world projects, not just demo apps.
🌟 Where to Go Next
You’ve got a working Blognami app. Now let’s keep the momentum going:
📂 Check out the code
Both Blognami and Pinstripe are open source. Dive into the code, learn how it works, and maybe even make your first pull request. 👉 Visit the GitHub repository
⭐ Give it a star
If Blognami helped you or inspired you, please give it a star on GitHub. It’s a quick way to show support and helps more developers discover it.
💬 Share your thoughts
Have feedback? Found a bug? Got a feature idea? Open an issue or start a discussion in the GitHub repo. Your feedback will directly help shape the future of Blognami.
🚀 Get involved early
Blognami is still in its early days. This means your ideas, contributions, and experiments can have a huge impact — whether that’s code, docs, testing, or just trying it out and reporting back.
👋 Hi, I’m Jody Salt, the creator of Blognami. I’d be genuinely excited to see you get involved — even if it’s just to say hi or tell me what you built.
The journey is just beginning, and you’re invited. ✨